09 10 expr:class='"loading" + data:blog.mobileClass'>

Search This Blog

Showing posts with label Easter. Show all posts

Friday, April 19, 2019

Easter's On Its Way!

Hello everyone, I am here today to share some cards for Easter that I created with ease using products from ScraPerfect.  Take a look at what I designed, here is my first card:


Here is the inside of this one:


And now my second Easter card:


And the inside of this one:


And finally, my third card:


And the inside of the third card:


Now, let's talk about how I created these cards.  I began by making card bases out of card stock.  Then I used some hand dyed paper that I purchased for layering.  I cut our Easter related images from paper from my stash, and began assembling my cards.  The only adhesive used in making these three cards was the Best Glue Ever.  How great is it that I could use it for all types of papers and my embellishments?  The only thing to consider is the weight of what you are securing to your card.  For larger items, use a large glue dot and let it cure until clear before adhering to your card.  Always use a No Clog Writing Cap on your bottle too for precision when attaching tiny things.


For these cards, I did use some tiny embellishments like sequins and pearls.  To ensure that my sequins were perfectly paced, I used my Embellie Gellie to grab them.  I love this product!


For added interest on my trio of cards, I decided to carry some of the design elements from the front of my cards to the insides.  I love working with pastel colors and had fun making embellishment clusters for the inside of my cards.  Since I know that these cards will be hand delivered for Easter, I could have more chunky bits on it and add more to the insides.  I hope my loved ones will like what I created for them  this Easter!

Thanks so much for stopping by today, I hope I have inspired you to make some Easter or Spring cards of your own.  Grab your essentials from ScraPerfect and while you are there follow us on social media.  

Crafty Hugs,

Kim 

Saturday, March 9, 2019

Hippity Hoppity Easter's On It's Way!

Hello everyone, I am. here today for ScraPerfect to share a home decor project that is great for Easter or Spring.  I love home decorating for the holiday and found a frame on clearance to alter and I love the way it turned out, thanks to the amazing products from ScraPerfect.  Here is what I created, I hope you like it:


To begin. I measured and cut the cream crochet ribbon and ivory sequin trim and set them aside.  Then I applied small dots of the Best Glue Ever along the turret on the perimeter of my mint green photo frame.  I applied the crochet ribbon while applying gentle pressure and repeated the process with the sequin trim.  I took the back of my frame off  and attached ivory organza to the inside with the Best Glue Ever.  I made medium sized glue dots  from the Best Glue Ever and used them to secure the tea dyed doily to the organza.  This was also done with the rusty overalls, which I swiped with a beige ink pad to give a distressed feel. Whenever I am working with the Best Glue Ever, I keep a small No Clog Writing Cap on my bottle for precision and to reduce the amount used since a little goes a long way!


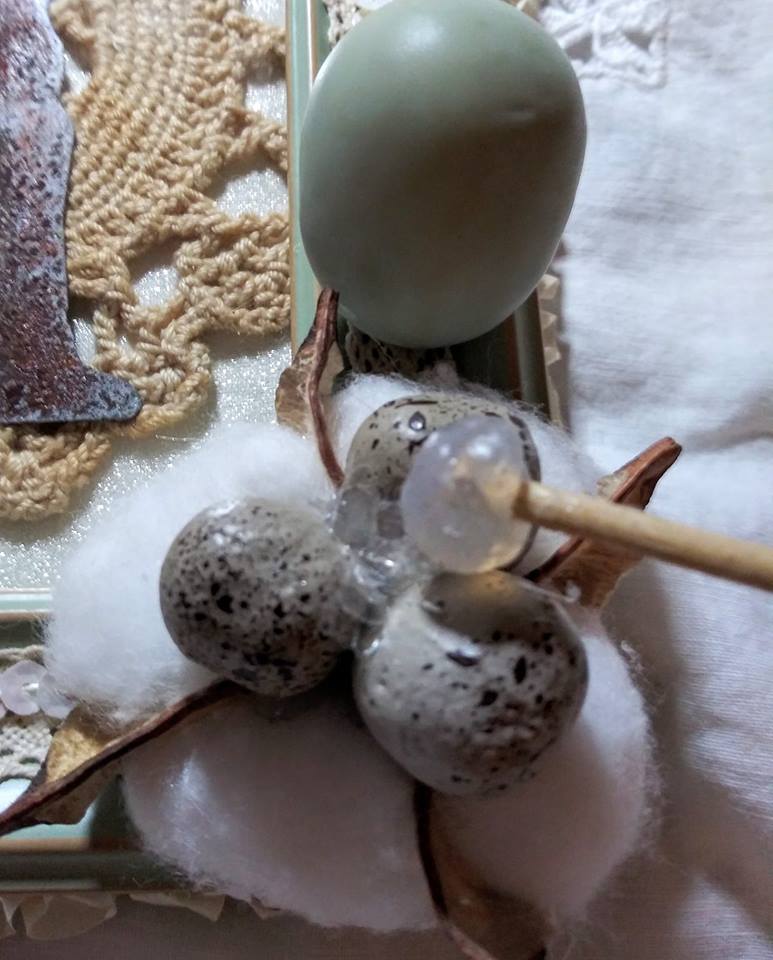
Now it is time to embellish my project.  I used the Best Glue Ever to attach the mint green metal clip to my frame.  It holds my hanging rabbit resin embellishment that I also added a small ivory gross grain bow to.  On the opposite corner, I used  large glue dots of the Best Glue Ever to secure the white cotton bud and small grey speckled eggs on top to my project.  I also attached the large green egg this way.  Then I got out my Embellie Gellie to add some mica flakes in the middle of my small egg trio, as well as on the clip on the top of my frame.


Thank you all for stopping by today to check out my home decor piece, I had fun making it and can't wait to display it for Easter.  Please be sure to follow ScraPerfect on social media and stop by the store website to purchase your supplies too, you won't be sorry!  If you would like to see more of my work, you can subscribe to my blog, Vintage Rose Creations by Kim.

Until Next Time,

Kim Lippincott