09 10 expr:class='"loading" + data:blog.mobileClass'>

Search This Blog

Tuesday, June 25, 2019

Try Stampin On Tuesday Card Challenge 414

Hello!  I hope you are all enjoying your Summer!  Today I am sharing a card that I created for the challenge blog, Try Stampin On Tuesday.  I am really enjoying these challenges and hope you are too, they are helping me try different styles and use some supplies buried in my stash.  This card was based on the sketch below and had the optional theme is Summer fun.


I got out some ribbon that I had been saving and some bright colored card stock and embellishments and created this card, which is my take on Summer fun:


I really had fun using some things that I wouldn't normally create with for this card.  I started by swiping my card with a bright pink ink and then cut my piece of printed ribbon.  The pattern of the ribbon reminds me of summer fun in the sun.  I secured my ribbon to the card and then added a bright pink striped card stock to the left of it.  I cut a piece of a very bright lime green card stock.  Then I stamped my sentiment on a small piece of white card stock and added foam dots to the back for dimension.  To make the center of my card stand out, I added a row of lime green and pink sequin trim on both sides of my sentiment.   I fussy cut three of the leaves from the ribbon and added them around the sentiment.  A white and bright pink tiny paper flower were also added.  I used a clear stickle on the fussy cut leaves as well.  I like how bright and cheery this card is, which also reminds me of summer time.

I hope you like my card and will play along in this week's challenge!  To see more of my work, please subscribe to this blog. I would love for you to leave me a comment.  I will be back next month with more TSOT challenges, so please check back!

See You Soon,

Kim Lippincott


Wednesday, June 19, 2019

ScraPerfect Makes Clean And Simple Cards Quick and Easy!

Hi there!  I am here today to share two quick and easy, clean and simple cards that I made with the help of the products from ScraPerfect.  I have seen many out there posting quick and easy cards and thought I would challenge myself to make some too.  Clean and simple cards are also a challenge for me since I love embellishments!  I am stunned that the only supplies I needed was 3 sheets of 12 by 12 paper, some sequins and buttons, white ribbon,  the Best Glue Ever and Embellie Gellie.
I even had some of the paper left over!  Here are the cards I created:


I began by cutting a sheet of yellow 12 by 12 paper into 2 card bases.  I then choose some paper by Illustrated Faith and cut out the pieces that I wanted to add to my card.  I used the
Best Glue Ever with the large No Clog Writing Cap on top to apply tiny dots to the paper pieces and then secure to my cards.  This step was made easier since all of my paper stuck to the card stock very well since the Best Glue Ever has the best stick factor out there!


To quickly add some embellishments to my cards, I grabbed some small buttons and sequins and my
Embellie Gellie and was able to place them perfectly on my cards.  I love this product sine I don't have to worry about dropping tiny pieces or accidentally getting them stuck in the glue.  Look at how easy it is to use:


As a finishing touch, I made 2 bows out of white organza ribbon and added them to my cards with a large glue dot of the Best Glue Ever.  I added a button to the bow centers and since they were a bit heavier on the bow, I waited until my glue dot cured and was clear before attaching the bows to the cards.  I think they give my cards the perfect touch.  I think my clean and simple cards came out pretty cute and were definitely quick and easy thanks to ScraPerfect!  Here is a closer look at both of my cards, I hope you like them:


Thanks so much for stopping by today!  Be sure to follow ScraPerfect on social media and follow the blog to find creative inspiration and information about the entire product line.  

Crafty Blessings,

Kim 

Tuesday, June 4, 2019

Tr Stampin On Tuesday Card Challenge 411

Hi there!  Today I am sharing my first card for June as a Guest Designer for the card challenge blog, Try Stampin On Tuesday.  Please check out the challenge out and play along.  The design for this card is based on the sketch below and had the option to be vintage/grunge style.


I gathered up some inks, sprays, and vintage themed papers from one of my favorite paper pads and created this card.  I have made many things vintage as it is one of my favorite styles, but the grunge aspect is newer to me, so this truly was a challenge for me.  This is the card I made:


To begin, I sprayed my card base with the Vintage Photo Distress Oxide spray and heat set it.
Then, I cut my vintage printed card stock pieces and swiped with the Frayed Burlap distress ink and the Antique Linen Distress Oxide ink pads and heat set that as well.  I wanted the paper to be the main focus, so I kept my embellishments to a minimum.  I added a small doily that was also sprayed and placed a vintage button in the center of the doily.  A trio of vintage buttons were also added to the top right of my card.  For added interest, I also used the caramel Nuvo Drops in the center of some of the buttons.  I hope you like my take on vintage/grunge and appreciate you stopping by today.

Again, please subscribe to the Try Stampin On Tuesday Blog so you can follow or play along with all of the challenges,.  If you would like to see more of my makes, please subscribe to this blog and feel free to leave me a comment.  I will be back again at the end of the month with another challenge.

Until Then,

Kim Lippincott

Try Stampin On Tuesday Card Challenge 410

Hello everyone!  I am continuing my term as a Guest Designer for the Try Stampin On Tuesday Blog with a new card challenge.  I really enjoy challenges and hope you do too!  This is what the sketch looked like for this challenge, it also included the option to use pastels.


I got out some pastel papers and created this card based on the design above:


I started by swiping the edges of my card with the Tattered Rose Distress Oxide ink and heat set it.  Then I used my circle punch to cut a circle out of a paisley printed card stock.  I used the same distress oxide ink pad to stamp a fleur de lis in the center of the circle. I assembled my layers and used a coordinating solid colored blue and pink card stock.  Next I added the blue and white damask printed paper.  For embellishment, I added white and pink sequin trim and a gorgeous pearl and rhinestone trim.  I also added a few pieces of tiny pink bling.  To finish off my card, I added a fabric bow and a blue rosette to the side of my card. What I love about this card is that it is versatile enough to be used for any occasion.

If you would like to play along with this challenge, please subscribe to the blog, Try Stampin On Tuesday.  If you would like to see more of my creations, please also subscribe to my blog.  I will be back with two more challenges in June, so please check back!  Thanks for stopping by today, I'd love for you to leave a comment.

Crafty Blessings,

Kim Lippincott

Sunday, May 19, 2019

A Perfect Vacation

 Hello everyone  today, I am sharing a card that I made in honor of summer approaching.
  Thoughts of the beach and summer days spent there inspired this project.  I hope you like it!


I began this card by securing the striped card stock to my card base with the Best Glue Ever
  I also have a large No Clog Writing Cap on my glue bottle.  It helps reduce waste by providing more control and you only need a tiny amount and the stick is fantastic!


I made an large embellishment for the top of my card by attaching a piece of card stock from the Graphic 45 collection called Sun Kissed to a piece of ribbon.  I used foam tape on the back of the card stock for dimension, and secured the ribbon to my card with glue dots made from the 
Best Glue Ever. I added some coordinating orange sequin trim to the sides of my card stock as well. Three royal blue sequins were added to both sides also and I added clear crystal stickles from White Rose Crafts to the beach image.


For the middle of my card I cut out two flags from the same paper collection and attached them to the card next to each other with the Best Glue Ever.  I added a blue sequin at the points of each flag for interest, and placed them perfectly by using Embellie Gellie  I used a 2 and a half inch circle punch and punched out a circle from some jellyfish paper from my stash.  Using a distress ink pad, I stamped my sentiment, which reads " a perfect vacation".  Finishing my card off, I used glue dots made from the Best Glue Ever to secure  two small shells and a piece of sea stone to my card.  


Making this card has made me want to go to the beach and have a perfect vacation myself!  I hope it has inspired you to dream of the beach and create something beachy too.  It was easy with the help of the products from ScraPerfect and White Rose Crafts.  The design for this card was provided by the White Rose Crafts Blog as it is their Sketch Challenge for May.  I will be entering my card in this challenge.

Until Next Time,

Kim 

Monday, May 13, 2019

Try Stampin on Tuesdays Card Challenge

Hi there!  I am excited to announce that I will be a Guest DT for Try Stampin on Tuesday for the next three months!  Try Stampin on Tuesday is a great card challenge blog with very creative sketches.  If want to play along, subscribe to the blog Try Stampin On Tuesday.  The card I have designed is for the challenge number 408, here is the sketch:


Here is the card that I created:


I have always loved France and since it's been in the news recently and my Daughter is there as I write this; I was inspired to create a card with a Parisian feel.  I started with a blank white card and swiped it with the Tattered Rose Distress Oxide by Tim Holtz.  I cut shapes to match the sketch out of 2 slightly varied colors of pink card stock and one from a hand dyed pink paper.

To add texture, I used Ranger texture paste and applied it with a palette knife through a floral Tim Holtz stencil.  After drying with my heat tool, I lightly swiped it with the Tattered Rose Distress Oxide pad to add subtle color.


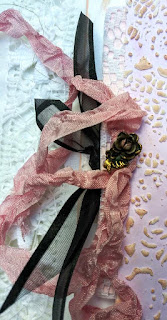
I added a beautiful metal rose button and I tied pink crinkled seam binding and black organza ribbon under it.  I really like the contrast they provide.  On the right side of my card, I covered one piece of the pink car stock with a gauzy white lace.  I secured a black Eiffel Tower die cut to that with foam tape for dimension.  I also added some tiny pink rhinestone embellishments on it to dress it up a bit.  I also added a piece of ephemera with the word "French" on it and decorated that with two tiny pearls.


I chose to leave the inside of the card blank since it could be stamped when an occasion arises to use it.  I think it would be pretty for a female birthday or Mother's Day card.  I hope you like it.
I will be back again later in the month with another sketch challenge.  Please follow along or play along, you can see all of the entries and sketches on the Try Stampin on Tuesday blog.


Until Then,

Kim Lippincott


Sunday, May 5, 2019

Best Cleaner Ever Saves The Day!

Hello everyone, I am. here today to share with you some exciting news from ScraPerfect about the Best Cleaner Ever,  It's new and improved and now works even faster and has a lovely new orange scent.  I have been anxiously awaiting this and was holding on to a holographic rose framed photograph that had become a mess over the years, so I could test it out first hand,  Here is what my photo looked like before:


I started by spraying a few spritzes of the new and improved Best Cleaner Ever over the entire front of my photo.  I then grabbed my Perfect Cleaning Cloth and rubbed the stained patches with some pressure.  It was so great that I didn't have to wait a bit and could start cleaning right away.


A quick pass through with a paper towel to wipe off the excess was next.  I was truly amazed to see how well this worked!  I am excited to try it on all types of surfaces now.  It's non toxic too so you don't have to worry about your kids or pets coming into contact with it.  Here is how my photograph turned out, the results speak for itself:


What a difference!  I am ready to hang it up in my craft room and enjoy this every day!
I would highly recommend getting a bottle or two of the new and improved Best Cleaner Ever, keep one in your craft space and give one to your husband for his tool box like I did.  Thanks for stopping by today, be sure to follow ScraPerfect on social media and subscribe to the blog for daily inspiration,  To see more of my work, subscribe to my blog, Vintage Rose Creations by Kim.

Until Next Time,

Kim

Wednesday, May 1, 2019

Simply Create Too Anything Goes Challenge

Hello everyone!  I am here today with a project share for a card challenge blog that I design for.  You can subscribe to the blog so you can play along at Simply Create Too.  This month the theme was anything goes, so I had the freedom to design whatever I wanted.  Here is the card I created:


I have always loved roses and hadn't used the Vintage Rose paper pad by Stamperia in a while, so I decided to use this gorgeous collection.  I used a pink card stock for my card and then added layers from the paper,  I swiped all of the papers with the tattered Rose Distress Oxide pad by Tim Holtz and then heat set it.  A pink clay handmade rose was added as the focal point in the center of my card, which I colored a pale pink with a mica eyeshadow.  It is flanked by white irridescent sequins.  Two beaded bridal appliques were secured to the corners of my card with Fabri Tac.  I fussy cut two tags from the Vintage Rose paper pad and then punched holes in them with my Crop-A-Dile.  I tied a loose bow with some pink chiffon fabric and added it to my card.  Then, I added a charm and both tags to a silver garment pin and pinned it through my bow.  Next to that I added a silver metal rose button.  White fringe trim was added to both tags, and crystal stickles by Dove craft from White Rose Crafts were added to all of the roses on my card for a great sparkle.

I love the way it came out and could see it as a Mother's Day card or a card for a friend that loves roses as much as I do.  I hope you like what I created and will follow along or play along in this months challenge for Simply Create Too.  I will be back again in June for the next challenge.

See You Then,

Kim Lippincott

Friday, April 19, 2019

Easter's On Its Way!

Hello everyone, I am here today to share some cards for Easter that I created with ease using products from ScraPerfect.  Take a look at what I designed, here is my first card:


Here is the inside of this one:


And now my second Easter card:


And the inside of this one:


And finally, my third card:


And the inside of the third card:


Now, let's talk about how I created these cards.  I began by making card bases out of card stock.  Then I used some hand dyed paper that I purchased for layering.  I cut our Easter related images from paper from my stash, and began assembling my cards.  The only adhesive used in making these three cards was the Best Glue Ever.  How great is it that I could use it for all types of papers and my embellishments?  The only thing to consider is the weight of what you are securing to your card.  For larger items, use a large glue dot and let it cure until clear before adhering to your card.  Always use a No Clog Writing Cap on your bottle too for precision when attaching tiny things.


For these cards, I did use some tiny embellishments like sequins and pearls.  To ensure that my sequins were perfectly paced, I used my Embellie Gellie to grab them.  I love this product!


For added interest on my trio of cards, I decided to carry some of the design elements from the front of my cards to the insides.  I love working with pastel colors and had fun making embellishment clusters for the inside of my cards.  Since I know that these cards will be hand delivered for Easter, I could have more chunky bits on it and add more to the insides.  I hope my loved ones will like what I created for them  this Easter!

Thanks so much for stopping by today, I hope I have inspired you to make some Easter or Spring cards of your own.  Grab your essentials from ScraPerfect and while you are there follow us on social media.  

Crafty Hugs,

Kim 

Thursday, April 18, 2019

Junk Journal Kits For Sale!


Hi there!  Today I am sharing some great junk journal kits that I have for sale.  They are chock full of fabulous goodies to make a junk journal.  All you need is a cover and some adhesive and you are ready to create!  Here are some photos of the kit I am offering for $20 plus shipping:


This is the complete kit, now let's take a closer look at what is in the kit.  Here are the papers:


You will get hand dyed paper sheets, music paper, book paper, map pieces, receipts, tags, and bags, tabs, playing cards, and dyed coffee filters, tickets.  Here are the fibers:


These will be great for Boho beads or to wrap around paper pieces for embellishments.  Included is a ivory thread and a vintage thread for you to bind your journal with.  Now check out all of these extras:


The extras include a yard of vintage black velvet ribbon, a yard of white lace, wooden buttons, safety pins, charms, beads, paper clips,brads,  a tassel and yoyo, and some ephemera.

I do ship internationally and I do combine shipping.  I accept payment via Paypal.  If you would like to order a kit (there are 5 available), you can comment here.  You may also order through my Facebook store page, which is, Vintage Rose Creations.  That is also where you can see my full inventory. Thanks for stopping by today, please subscribe so you don't miss anything and come back soon!

Crafty Blessings,

Kim


All About Embellishments!

Hello everyone, I am here here today to share something special with you!  This month, each of the ScraPerfect Designers are creating handmade embellishments using the line of products offered by ScraPerfect,  This is going to be an exciting way for you to see the many possibilities that you can create at home to use on your projects.  I have chosen to make some embellishments with yoyo's and bottle caps.  I am featuring the Best Glue EverNo Clog Writing Caps,  Embellie Gellie, the Tiny Bottles of Embellishments, and the Wheel of Embellies,  Here are the embellishments that I created:


Let's start with the bottle caps, for these I painted the top of the bottle caps with white gesso and let dry.  Then I squeezed a small amount of the Best Glue Ever on (with the No Clog Writing Cap on  the bottle always) and used a brush to spread evenly.  Once tacky and clear, I put my bottle caps in a small dish and sprinkled some of the rose gold  glitter from the Tiny Bottles of Embellishments on top and let that cure.


Once dry, I also used the Best Glue Ever to adhere my embellished bottle cap to a doily (with large glue dots).  I repeated this process to attach a paint sample card behind that.  For added interest, I also added a tiny resin bow on top of my bottle cap with the Best Glue Ever.  I love the way it came out and think it would be a great addition to a card or scrapbook layout.


I made two other decorated bottle caps, to be used as embellishments on my future creations:


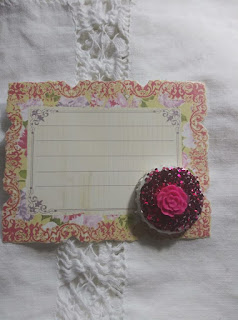
For this one, I added glitter and a resin rose to the bottle cap and attached it to a store bought ephemera card.  I  think t his one would be perfect for a junk journal embellishment!


On this bottle cap, I adhered silver micro beads from the Tiny Bottles of Embellishments with the Best Glue Ever and added a clear resin rose on top.  I attached it to a store bought bow.  I thought this one may go in my planner as a cute embellishment.

Now, on to the yoyo's.  I love using these in all types of my creations and love how they look as embellishments.  Since they are made of cotton fabric, I used medium sized glue dots made from the Best Glue Ever to adhere them to each other.  I made 3 different types of embellishments with the yoyo's:


 In my opinion, this embellishment would be very pretty on a vintage style project.  It's simple to make too!  Just use the Best Glue Ever to attach the yoyo's to each other and then to the doily.  Add a dot of glue in the center hole of each yoyo and drop a loose pearl inside.


I used a store bought piece of ephemera for this one and added a yoyo, a small doily and 3 loose tiny pearls in the center.  I then added 2 tiny pearls to the sides of the ephemera and added some pretty trim to the back.. I think this would be a great belly band for a junk journal, or on a gift bag!


This one was done in the shabby chic style and was also very easy to make.  Cut a triangle out of denim, add some of the rhinestones from the Wheel of Embellies with the Best Glue Ever, and attach to a yoyo.  Then add a crocheted flower with a tiny pearl in the center and you are finished.  I love the sparkle on this one!

I hope you like the handmade embellishments that I created and will try to make some of your own.  They are great to gave on hand when you are creating and can be added to anything! Thank you for stopping by today, please check back to see what the rest of the Designers make and follow
ScraPerfect on social media so you don't miss anything!  

Crafty Blessings,

Kim 

Tuesday, March 19, 2019

Do You Love Fairies?

Hi there!  Kim L. here today to share my latest make for ScraPerfect.  Do you like fairies?  If so, you will love the card I just created.  I am relatively new to the world of fairies, but am quickly falling in love with them.  They inspired this card, I hope you like it:


I was inspired by the paper I found in my stash that I got from White Rose Crafts and challenged myself to use colors outside of my comfort zone.  So I began by painting a purple glittered paint on my card for the background.  I also swiped a purple ink around the edges of my card, inside and out front and back.   Then I secured a green paint chip to the card using the Best Glue Ever of course with a small No Clog Writing Cap on top for precision.  I only used small dots of glue since you only need a tiny amount for a great hold.  Repeating this process, I finished my background with a white heart shaped paper doily and the fairy paper from my stash.


I added a pretty sequin trim around the portion that was painted purple with the Best Glue Ever in a thin line.  I let this sit for a few minutes before working in that area on my card.


Now that my background was done, it is  time to embellish my project.  This is the part of the process that I enjoy most!  I wanted to give my fairy some sparkle, so I covered her dress with the
Best Glue Ever and then gently shook a lavender Tiny Bottle of Embellishments over the dress and it turned out very pretty!


Some self adhesive gems were also added for interest, as well as two sequin stars in different shades of purple.  On the top center of my card I added a lavender polka dot bow and a paper flower.  I embellished the center of the flower with a dew drop from my stash,  I adhered this to the flower with the Best Glue Ever and placed it perfectly using Embellie Gellie.  This product is fabulous for placing tiny embellishments that are so hard to keep track of or get stuck to your fingers.


Trying something different, I also added pieces of my fairy paper to the inside and back of my card with the Best Glue Ever.  I like how these details added a unique touch to my card.


I really appreciate you stopping by today to see my fairy themed card.  Please be sure to go to ScraPerfect to get supplies for all of your crafting needs and follow ScraPerfect on social media for updates and inspiration.  I would love it if you would follow my blog as well, Vintage Rose Creations by Kim, to see more of my work.  

Crafty Blessings,

Kim Lippincott