09 10 expr:class='"loading" + data:blog.mobileClass'>

Search This Blog

Thursday, November 9, 2017

Fun Fall Altered Canvas

Hi there! Today I am sharing a Fall project with you.  Have you ever started a project and lost inspiration and set it aside?  I had one of those from last Fall that I was determined to finish.  Here is how it turned out, thanks to my ScraPerfect products:


Here is what I started with, a canvas that I made a background on with water color pencils and a water brush, that sat for a year.


I jazzed it up a bit with some metallic copper ink and Distress Crayons, then got out my cutting machine and the Best Glue Ever and got inspired.  I cut out a Fall design and used the Best Glue Ever with the No Clog Writing Cap on and glued each word or letter on with small dots of glue.


I still wasn't happy with it because it was one dimensional, so I got out some embellishments and went to town. I used the Best Glue Ever to highlight some elements of the design by adding glitter and micro beads.


I placed the brown button with the help of Embellie Gellie.  I don't fiddle with small items anymore since I started using this over a year ago, I love it!


I also used the Best Glue Ever to adhere some orange roses coated with copper glitter to the canvas.  I cut some multi colored leaves out from both plain and textured card stock and coated them with micro beads for interest too.  I put foam squares on the back of the card stock leaves to make them pop.  I recycled the  leaves from the roses and attached them to my canvas with the Best Glue Ever.


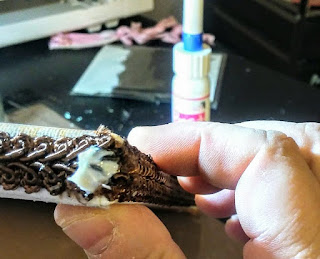
For more embellishment , I used the Best Glue Ever to glue some brown braided trim around the outside of the entire canvas.  It looked more finished to me with it. Because I like bling, I also attached some beaded trim to hang down from the bottom.


My final touch was to add a loose bow to the top corner, made from a brown nylon material.
I applied some of the Best Glue Ever, waited for it to set clear, then held my bow in place for a minute until it bonded to the canvas.


I noticed at this point, that some glitter and micro beads had clung to my canvas where I didn't want them.  In hindsight, i should have wiped the canvas with the Perfect Crafting Pouch before getting the glitter out.  Well,everything can be fixed, so I tried the technique after the fact and it still worked great!  I will be leaving mine on my craft desk from now on so I don't have to learn this lesson again the hard way.


At this point, I was finally happy with the end product, hope you like it too!


Please subscribe to this blog, leave me a comment, and check out all of the wonderful products at 
ScraPerfect.  Thanks for stopping by!

Happy Fall,

Kim Lippincott


Friday, November 3, 2017

Quick and Easy Altered Vintage Spoon Featuring the Best Glue Ever

Hello everyone! I am here today to share another project made simple with the Best Glue Ever from ScraPerfect.  I recently went to a Vintage Market Fair and found some vintage cutlery to play with. Check out this gorgeous spoon I altered:


This is what it looked like before I started:


  I started by taking some Prima paper and fussy cutting some roses.  I applied some of the Best Glue Ever, using a bit more than I thought needed, since it had to bond to metal.  I then waited until the glue was clear before attaching to the spoon, about 5 minutes.


I wanted this to have a winter feel, so I brushed on some Best Glue Ever instead of a decoupage medium, then added my homemade snow mix (snow and lots of glitter).


Then, I started embellishing with flowers, Dew Drops, and tiny rhinestone bling. I was able to place these with ease using Embellie Gellie. I also used a medium sized glue dot made from the Best Glue Ever to attach pink and white seam binding to the underside of the spoon.


I also embellished the pink paper roses by adding small dots of  the Best Glue Ever on them and then sprinkling them with some snow/glitter mix. As you can see, I always use a No Clog Writing Cap on my bottle of glue...it's amazing!  It ensures precise glue placement and prevents me from using more than needed. I also used the adhesive to attach a piece of pink micro pom pom trim around the round part of the spoon.  My final touch was to rub some Metallic Lustre in Rose Gold on the stem of the spoon for more color.  As always, I used a spritz of the Best Cleaner Ever on my hands to make cleaning a breeze!


I plan to also use the Best Glue Ever to attach the tab from a soda can to the back of the stem of the spoon so I can hang it up.  I hope you like how it turned out!  This was truly a project made fast and easily with ScraPerfect!


Thanks so much for stopping by today, please check back again for daily inspiration.  Also, be sure to go to ScraPerfect and order your supplies to help you craft faster and easier!  Please subscribe to this blog and feel free to leave a comment.

Until Next Time,

Kim Lippincott


Sunday, October 22, 2017

Foiling For Fall With ScraPerfect

Hi there!  Kim here today to share a Fall home decor project.  Fall is my favorite season, but doesn't really exist in Florida so I decorate like it does!  I found this grapevine wreath with chicken wire at my local craft store for only $2!  Now I just have to wait for Halloween to be over so I can hang it up.
ScraPerfect made this project quick and easy!  Hope you like my Fall creation:


I started out by wrapping a white pip berry garland around the wreath. Using my Silhouette Curio, I cut out the leaves and words out of colored card stock. I repainted the pumpkin because it was gold when it was given to me.  After the paint dried, I added some Tim Holz distress glitter in rust and swiped the pumpkin lines with white ink. I handmade a bow with a gauzy ribbon and adhered that to the wreath.  Then I attached the leaves, then the pumpkin, and finally more pip berry garland.
As you can see, the pumpkin is embellished by mulberry roses in cream, orange, and brown. The orange roses have also been given a coat of glitter.  Here's a closer look:


For the  greeting, I foiled the card stock letters in orange and then attached them to pieces of the gauze ribbon  to make it easier to adhere them to the wreath. I added some of the glittered roses around the letters for embellishment there also.  Here is a closer look at that:


I have to say that the star of this project is the Best Glue Ever!  I did have to use large glue dots to adhere the pumpkin because of it's weight, but it is stuck on there very well.  I used varying sizes of glue dots on everything, depending on size and weight.  I allow my glue dots to dry a few minutes until clear to place item.  Here is a full list of the ScraPerfect products I used for this wreath:

No Clog Writing Cap ( for the top of the BGE bottle for precision)
Best Cleaner Ever (for clean hands)

And here is a last, closer look at my Fall decor wreath, thanks so much for stopping by!  Please check back, subscribe to this blog, and leave me a comment.


Happy Fall Y'all,
Kim 


Friday, October 20, 2017

Witchy Fun!

Hello!  I am here today to share with you a little Halloween project that I made with some of the wonderful products from ScraPerfect.  This is the top half of my creation, keep reading to see the rest...


I started out with a white five by seven canvas, which I painted a coat of Tattered Angels Glimmer Glam in silver on.  I also painted a paper mache star black and added the Glimmer Glam and a few spritzes of white spray on it too.


Using my machine, I cut out the die cut design and used a very small amount of adhesive to attach it to the canvas. With the Best Glue Ever, you truly on need the tiniest dot.  To help ensure you don't waste glue, attach the No Clog Writing Cap to the top of the bottle.  When you are done and put the top for the writing cap on, it will keep your glue bottle from clogging too!


I adhered the die cut to the canvas and then added a large glue dot to the top in the center.  I tied some black lace and gingham ribbon in a knot and put it on top of the glue dot, pressing lightly.  For further embellishment, I tied some black and white bakers twine through the holes of a button and added that to a rosette, which I attached to the center of the bow.  I added some Dew Drops from The Robins Nest to the canvas as embellishment too using Embellie Gellie.  I actually misplaced the stick that came in the package, but never fear!  I grabbed another stick from my stash and just made another one, easily possible because of the generous amount in the package.

The canvas was now ready for the star, which I planned to dangle from the bottom with bakers twine.  But first, I attached another rosette to the center with an embellished button.  I then embellished it with more Dew Drops.  I added 2 black tassels and some white eyelash trim to dangle from the bottom of the star.
I used a medium sized glue dot to attach the dangling star to the canvas to make one piece.
My final step is always to give my messy hands a few spritzes of the non toxic Best Cleaner Ever.


I really had fun with this home decor piece that I made for Halloween, here is a close up of the finished star: 


And here is what the finished product looks like, now all I have to do is decide where to hang it! I hope you like it:


Thanks so much for stopping by today, please subscribe to my blog and leave me a comment.
Happy Halloween!


Crafty Hugs,
Kim 

How To Make A Quick And Easy Shabby Chic Tag

Hi there, Kim here today to share a quick and easy project I created using my favorite products from
ScraPerfect.  This project was done quickly because I needed a tag to go on a gift for a baby girl last minute.  So I grabbed my bottle of the Best Glue Ever with the No Clog Writing Cap, the Embellie Gellie, the  Best Cleaner Ever, some supplies, and this is what I ended up with ten minutes later:


Here is what I did, I hope you will get out your supplies and try a tag in ten minutes.

Cut and adhere kraft paper to tag with the Best Glue Ever with the No Clog Writing Cap
Cut and adhere burlap pieces to tag using the Best Glue Ever with the No Clog Writing Cap
Cut and apply 3 coordinating washi tapes or fabric tapes to kraft paper, cut notch out of tails
Stamp sentiment on kraft paper, adhere foam dots to back for dimension, place in center of tag
Tie knot in pink polka dot ribbon, cut tails on diagonal, adhere to center bottom of tag using the Best Glue Ever with the No Clog Writing Cap
Make loops out of twine and glue onto polka dot bow with the Best Glue Ever with the No Clog Writing Cap
Adhere large organza rose to center bottom of tag, covering twine loops with the Best Glue Ever with the No Clog Writing Cap
Add 3 pieces of pink seam binding and 1 piece of twine to hole in top of tag
Add flatback pearls for embellishment throughout tag using Embellie Gellie to place and the Best Glue Ever to adhere with the No Clog Writing Cap
Add bronze safety pin to seam binding with pearl and birds nest charms.
Clean hands with a few spritzes of the Best Cleaner Ever
Write message on back of tag and add to gift

Here is a closer look at the details:


Items Used From ScraPerfect:


Here is a last look at the finished tag again:


Thanks for stopping by today, please take a moment to subscribe to the blog and leave me a comment. Have a great day!


Crafty Blessings,
Kim

Gather Your Embellishments and Check This Out!

Hi there!  I am  here today to share with you a fun project I have been working on all month, in steps.  I went clearance shopping at my local craft store and scored a Heidi Swapp Memorydex and some accessories.  You may remember these as a rolodex, but this one is for crafty inspiration and is a ton of fun to decorate using your products from ScraPerfect.  Here is what my finished memorydex looks like:


I made more cards than I want to count this month, the following was my process:

Grabbed a paper pad with smaller designs and my Best Glue Ever with the No Clog Writing Cap on and adhered background paper to my card, this glue made it go fast and stick like no other glue out there!

Used foam adhesive dots to attach smaller pieces of card stock for dimension.

Applied some planner stickers to some of the cards

Now the fun part...grab as many teeny embellishments as you can to decorate your cards.  Some examples of what I used were: washi tape, flat back pearls, sequins, buttons, paper doilies, resin frames, etc.  Using the Best Glue Ever and my Embellie Gellie, I placed all of my small embellies and let the glue dry overnight.

Give your hands a few spritzes of the Best Cleaner Ever for clean up, its safe for hands!

Assemble your memorydex with headers and your cards and browse through for inspiration when needed.

Here are more of the cards I created, I kept them clean and simple:


Warning: these can get addictive, here are a few more.


This project would be a great upcycle if you could find an old rolodex.  All you would need to do if the cards have been used, is gesso over them and you are all set to make your own crafty memorydex.  I hope you will give it a try, its fun!  Here is one last look at mine:


Thanks so much for stopping by today, please leave a comment and be sure to subscribe to the blog. 


Crafty Hugs,
Kim


Altered Canvas Wedding Decor Sign

Hi there!  I am here today for ScraPerfect with a project that I just finished for my daughter who recently got engaged.  I have altered a canvas that can be used as decor for the wedding and also a keepsake.  Everyone knows that the Best Glue Ever is the quick stick for paper crafting, but did you know you can also use it on heavier embellishments?  The Best Glue Ever was the only adhesive that was necessary to complete this project.  Of course I always have the No Clog Writing Cap on my bottle to ensure an even application and help to use only the smallest amount of adhesive possible.  When you see the small embellishments on my canvas, I used my favorite pick up tool to place them, Embellie Gellie.  I hope you like my canvas:


I started this project by painting the canvas taupe and once dry, adding a layer of pearlizing medium for some shimmer.  I then stenciled the Mr. & Mrs. in black paint and when dry, went around the perimeter of it with a layer of taupe for dimension.


After painting, I applied tiny of dots of the Best Glue Ever around the perimeter of the stenciled area. Then I placed ivory flat back pearls on the glue dots with Embellie Gellie.


Now I attached some trims to my canvas.  With a small line of the Best Glue Ever, I secured some taupe ostrich feather trim to the bottom back of the canvas hanging down.  I went around the outside edge with some gimp braided trim which gives a clean look.  I repeated that around the inside edge of the canvas with gimp braided trim.  You would be surprised, but a small line of glue holds this trim down very well!. I also added a row of the ivory flat back pearls all the way around the inside of the canvas for an elegant look.


I also wanted this canvas to have a vintage feel, so I added a vintage applique (that I cut up and used on the top corners) and an applique with lots of pretty dangling pearls. For an added touch, I added an ivory tassel to the back of the dangling pearl applique.


 I added the ribbon pieces to the back of the canvas, tied, a bow, and the adhered some ivory mini rosettes to the pretty white satin ribbon.  I also used some tulle and a larger rosette and attached it to the center of the bow.  I also added some small ivory pearl heart embellishments to the ribbon tails for a extra touch.


This canvas will be carried down the aisle after the ceremony, hang on the bride and groom chairs at the reception, and could even be hung in their home.  Thanks for stopping by today, please take a moment to subscribe and leave a comment.


Crafty Hugs,
Kim